Want to start a website, but not sure how?
Well, today I'm going to show you how anyone can start a website in Australia within 60 minutes. Plus you won't even need an overpriced web developer to help you.
Follow my guide and you'll have your own website up and running in no time at all. Plus we'll show you how to make your website super fast too.
Want to start a blog instead? Read this guide.
Download this guide as a PDF for later viewing.
Contents
How To Start A Website: Step-by-Step Australian Guide
There's a few things you should know before we start. Creating a website requires a little bit of startup capital. For most people it will be around $60 per year.
Next, there's many website builders out there that appear free, but actually end up costing you $100's of dollars every year as the free plan has many limitations forcing an upgrade.
I also recommend building a site on your own hosting platform as you'll own the copyright and can easily transfer your website to someone else if you sell your business.

Step 1: Your Great Idea
You need to decide what your website is going to be about and what you intend to accomplish.
If you want to sell products online, you might need an eCommerce platform which can be tricky to implement on a basic website, so you could consider using a hosted store builder such as Shopify.
If you're intending to build a small business website then this guide is perfect for you.
Step 2: Choose a Website Platform
When it comes to building your website you can use self-hosted or hosted solutions.
I'm a firm believer in doing things yourself, so a self-hosted solution is the best option.
52% of websites in the world use WordPress as their content management system and you might have heard of this platform already.

WordPress is a community project, supported by developers and is free to install. You simply need suitable web hosting and a domain name to install and use it.
This platform offers complete customisation including themes, plugins and more technical features such as aiding in Search Engine Optimisation for your website.
We actually use WordPress on this website, BestFive.com.au.
Step 3: Pick Hosting Provider & Domain
You need two things to start your website in Australia
Web Hosting
All websites need web hosting. This is space on a server that's connected to the Internet. There is servers like this all over the world, from Sydney to London and everywhere in between.
This is your storage facility. You'll upload your files here.
But you don't need to be an IT engineer to use it either, it's very straight forward.
And that leads me to the domain name. An easy way to access those files.
Domain Names
Imagine living on a road with no street numbers. You'd know where you live, but no one visiting you would be able to find you. A domain name allows those with the address to find you.

And you can choose 1 of 500 different extensions such as .com.au, .com, .net, .org etc.
However, your domain of choice might already be taken, a bit like real estate. So you'll need to choose something different or choose a different extension.
You can purchase your domain name and hosting together.
What’s The Best Web Host For Australian Websites?
There's many web hosting providers out there. You can purchase the domain name during the signup process.
After building dozens of WordPress websites over the years, the best provider in my opinion for Aussies would have to be Siteground.

They offer a Sydney based server, which means you'll get super fast connectivity, the ability to install your website within 60 seconds, and 24/7 support.
Plus you can pay only $4.95 per month ($AUD), with no long term contracts either.
I've managed to secure the best deal possible for readers of our magazine.
Step 4: Go To Siteground To Start
If you've already got a web hosting provider, jump over to step 5.
But we're going to show you how easy it is to purchase your hosting and domain name.
4.1: Head over to this URL for the best price.
The startup plan is more than enough for a basic website. If you're tempted by the larger plan then go for it, but 99% of readers will be fine on the small plan.
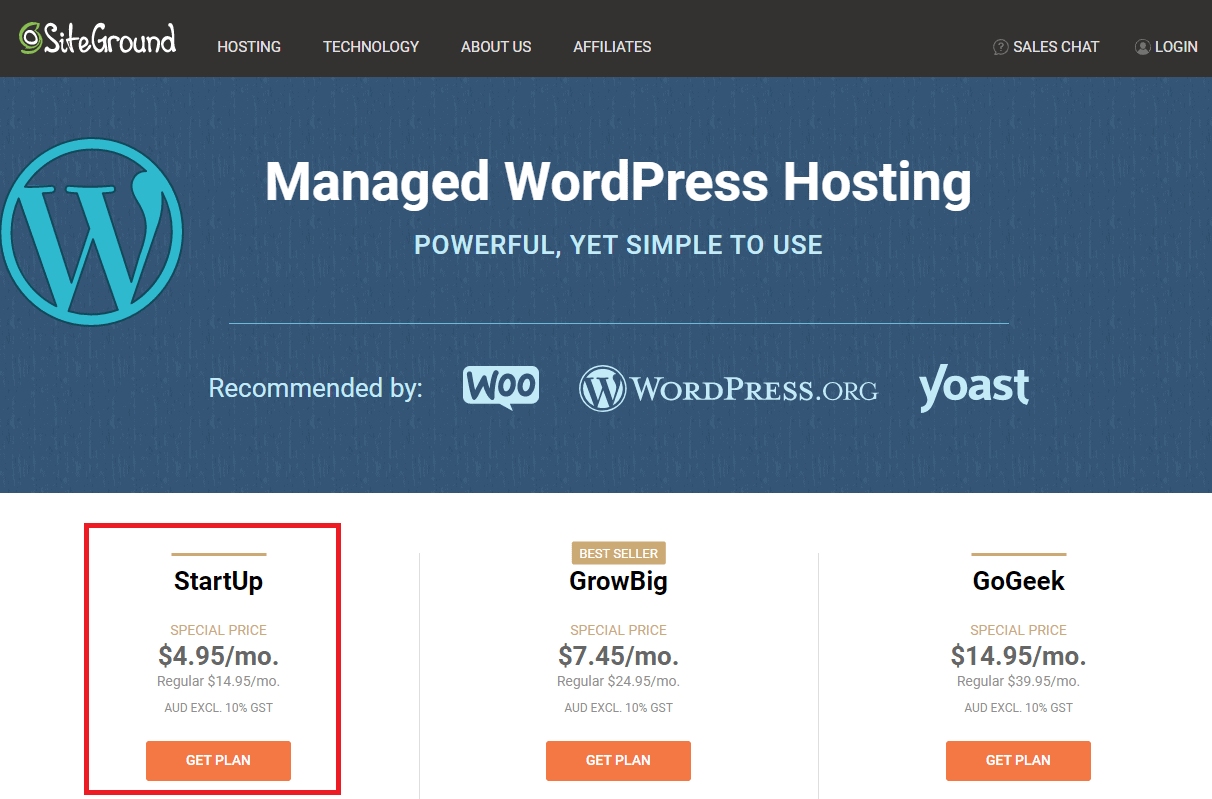
4.2: Enter your choice of domain name.
You'll want to choose a domain that's available. If you've already got one, I'll show you later how to connect this with Siteground.
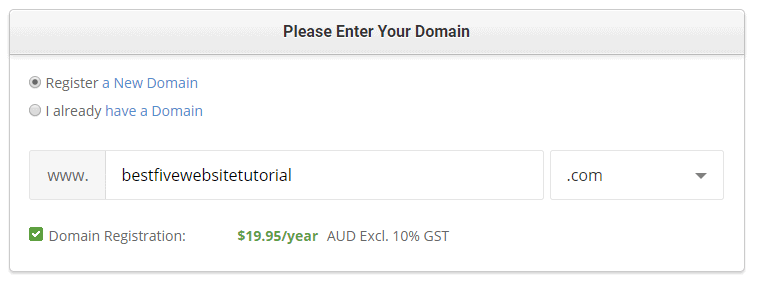
You'll need an ABN to register a .com.au. While this is preferred option for an Australian business, if you're a blogger or private individual, a .com, .net or .online domain might be better.
If you ever cancel your ABN, you'll likely lose access to the .com.au domain you bought.
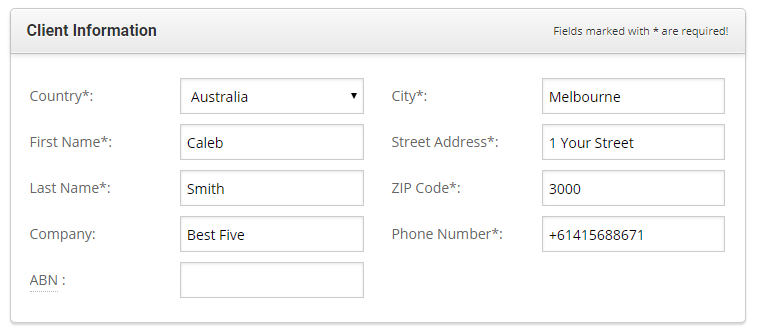
4.3: Enter your account information
Make sure you enter the correct information to avoid any checkout issues.

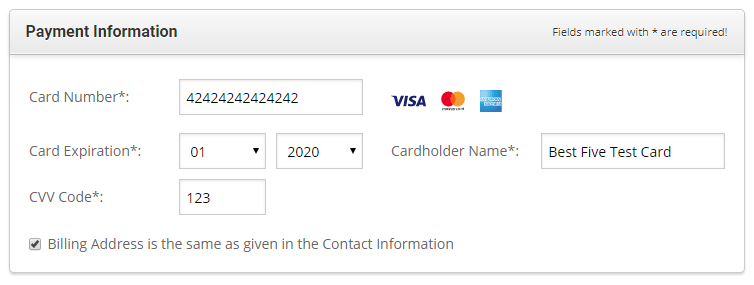
4.4: Enter your information
4.5: Choose your datacenter
If you intend to create a website for Australian's then you'll want to ensure this is set to Australia. If you're creating for US, choose United States etc.
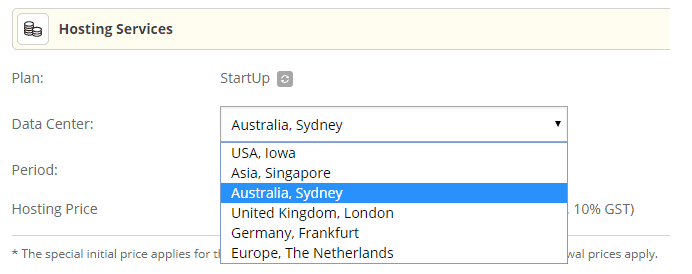
If you're doing both countries, choosing Australia is better as it's closer to your home, meaning your website will load much faster when creating it.
4.6: Choose period
Siteground offers the lowest price regardless whether you choose 1,12,24 or 36 months. You would get more value from a 12 month plan.

4.7: Complete your payment in Australian Dollars.
Many other providers bill you in USD which can 1.5x the price for AUD, so it's good to know what price you're paying. If you're GST registered, you can claim the 10% back on your BAS.

5. Install WordPress
You'll be pleased to hear that your web hosting account will likely be setup instantly. You'll receive your login details to your inbox within 15 minutes.
You'll be able to login to your account and then select 'WordPress'
Now click on 'Start a new website'
Enter your admin email, username and password.
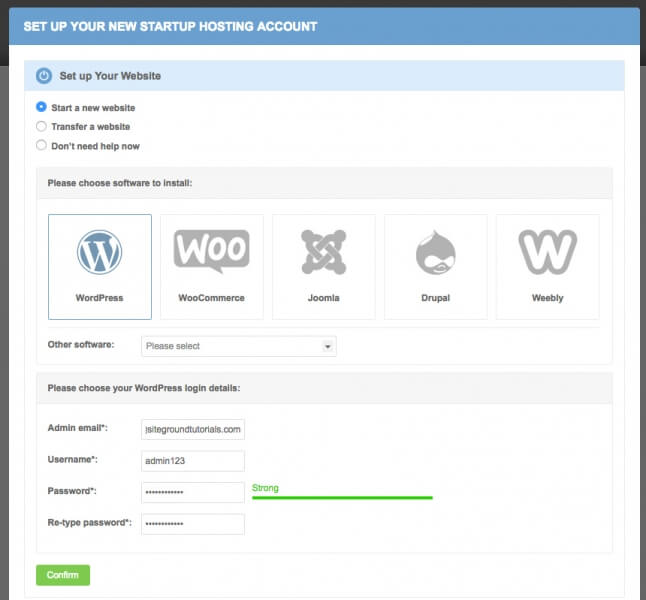
You can now enter any enhancements, however I recommend leaving the default.
Now click the 'Complete Setup' button.
Your WordPress site is ready. Less than 60 seconds.
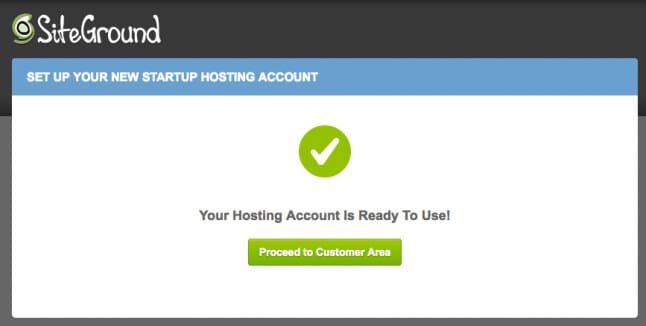
You can now visit yourdomain.com and view your new website. The theme might be a bit bland as there's no content yet.
6: Let’s Change The Theme
The power of WordPress is that you can customise everything quickly. One of the easiest ways to customise the theme is to install a free or premium theme.
6.1: Login to your Admin dashboard
All WordPress sites use yourdomain.com/wp-admin to access the administrator panel. You can login with your chosen username and password.
If you forget your password you can reset this on this page.
6.2: Overview of WordPress themes
WordPress makes it easy to find both free and premium themes using their theme search. You can search for themes and install them with two clicks.
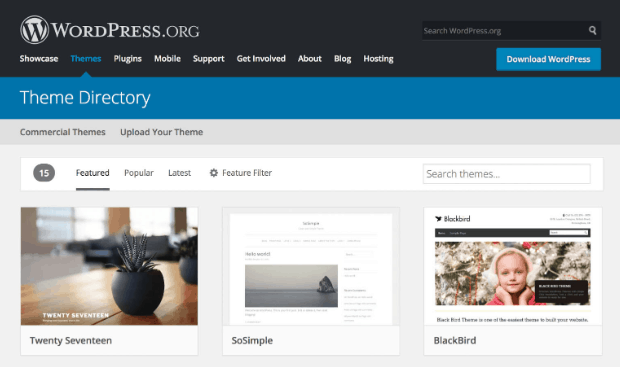
You can then customise them, but if you decide it's not for you, change it too another theme.
The best free themes are those that look great and work with your content. Different themes are designed with different users in mind such as business, fitness, photography etc.
The default WordPress theme is called 'Twenty Twenty' which is a good blog theme, but not that impressive if you're creating a unique blog.
There are more than 1,000 free themes on WordPress.org.
6.3: How to choose the best free WordPress themes:
Check it's responsive: This means it automatically adapts to users accessing your blog on mobile, tablet or computer devices. If it's not responsive, your theme will look awful on mobile.
Check the ratings: Under each theme is a star rating from other users. If it's less than 4 stars there's probably something wrong, so reconsider that theme.
Is there a premium upgrade: Some themes are very limited and that's because they want you to purchase their premium package instead.
Preview the theme: You can get a good feel and look for the theme by checking out this.
Further customisation: If your theme has no content, the previews can look quite bare as well. Be sure to look at the demo of the theme on the official website if available.
6.4: Free vs Premium Themes
Ultimately free themes are lacking in their features and developers encourage you to purchase their premium themes instead. You can pickup a premium theme for $30-$180.
Premium themes come with better features, more customisation and better support. Some theme vendors will even install the theme for free and make it look just like the demo.
You can then go in and customise the theme to your tastes. Themes are great as you no longer need to pay a developer thousands of dollars like you'd have had to do a few years ago.
6.5: How to Install Themes
On the left menu choose Appearance -> Themes.
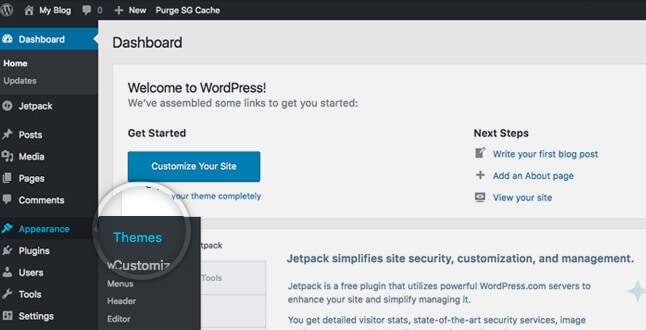
You can then choose "Add New."
You can now use the search box to look through the official WordPress theme directory. If you know the name of a theme you can search for it.
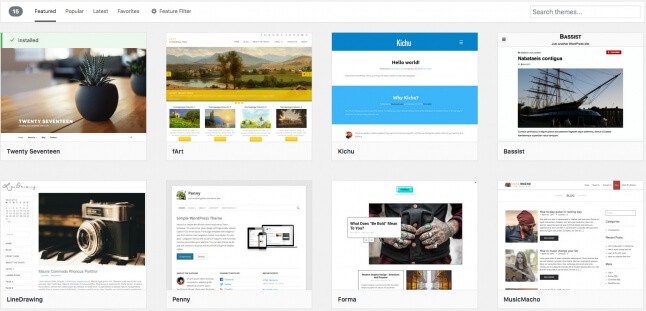
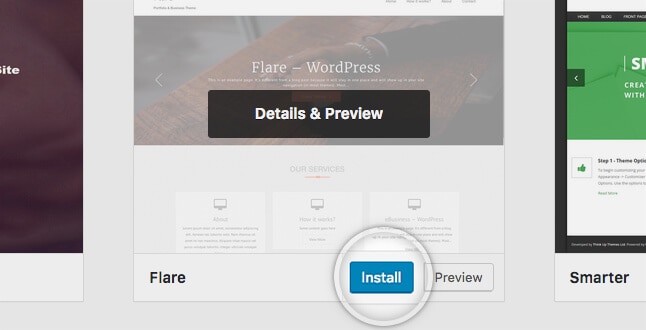
You can now click on a theme and choose "Install" or "Preview."
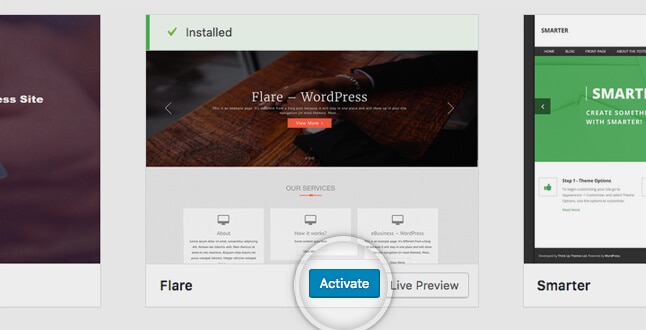
Once Installed you need to click on "Activate"
6.6 How To Customise Themes
On the left menu you'll now have a 'Customise option' under the Themes option.
From here depending on the theme you installed, you'll be able to change everything from the logo, title and colour scheme, to the sliders, backgrounds and images.
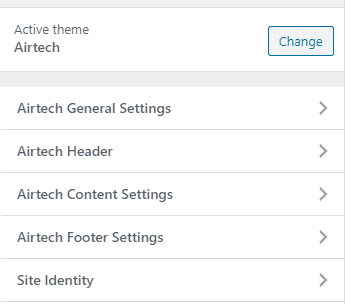
Unfortunately there's so many themes out there, I can't provide instructions that would be relevant to you as each theme would be different.
Be sure to checkout the theme vendors website for documentation on customisation.
7: Customise Website Settings
The first thing you might like to change is the title and slogan of your website.
To do this we go to Settings -> General and you'll see something like this:
You can change the fields, but make sure you click 'Save Changes.'
7.1: Change Permalinks
When you create content, your posts will have unique page links such as yourdomain.com/article1
These are called permalinks and by default they will be something such as /p=1234 (Plain)
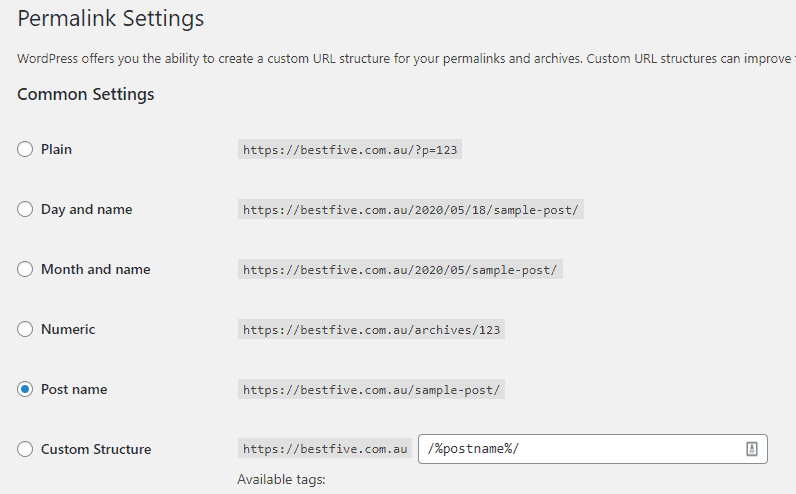
This is untidy and should be changed to 'Post Name'
Go to Settings -> Permalinks and change this, and save once completed.
7.2: Add Classic Editor Plugin
WordPress recently upgraded their platform to include something known as Gutenberg editor, but for most people it's quite confusing to use.
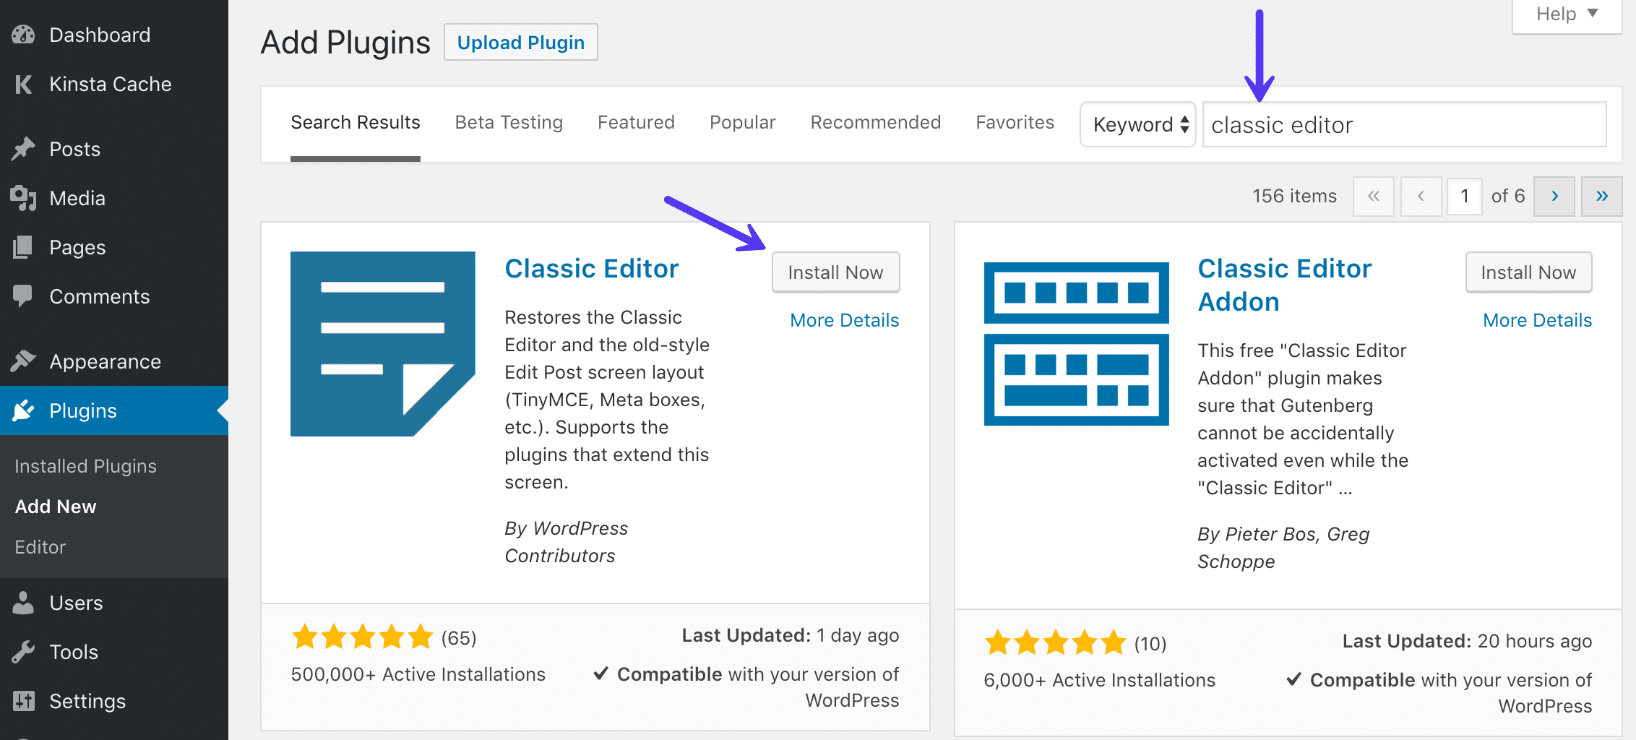
For that reason, some developers created a plugin that restores the old classic editor. It's been installed over 5 million times so it's definitely a popular change.
There's no customisation required. Simply install and you'll notice how easy it is to create posts and pages going forward.
7.3: Add SEO Plugin (Rank Math)
Search Engine Optimisation is the art of placing your website or blog in Google so when someone searches for something, your article pops up.

By default WordPress isn't very good at helping your site to rank well in Google, Bing or Yahoo. That's why you need a free plugin called Rank Math.
You can install this through the plugins menu and follow the step by step prompts to setup. There's actually a full length tutorial on how to configure this here.
This will allow you to customise the title and description that appears in Google.
The plugin also shows you how to write better content, how to structure your posts, how to add links and images for better SEO and how to use focus keywords to your advantage.
8: Create Posts & Pages
Your website is now ready for posts and pages. But what's the difference?
Pages are static content that doesn't change regularly, such as "About" or "Contact."
Posts are blog posts that likely change or are posted regularly.
If you're creating a business website, you'll likely have lots of pages, but less posts. If you're creating a blog you might have few pages, but lots of posts.
Go to Pages -> Add New
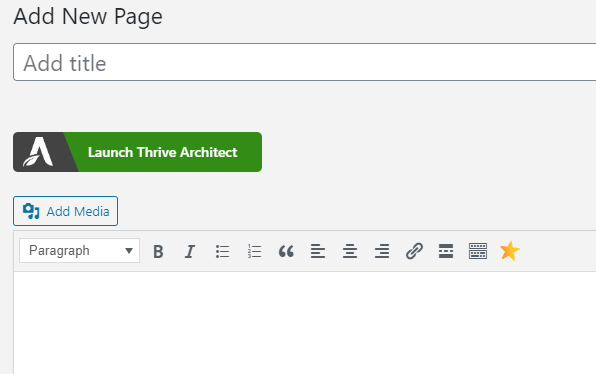
I recommend entering the page title and the content in the box that looks like a mini version of Microsoft Word. You can change fonts, colours, add links and lists.
Beneath this is your Rank Math plugin. Your focus keyword should be the keyword you're trying to rank in Google. i.e. Carlton Dentist.

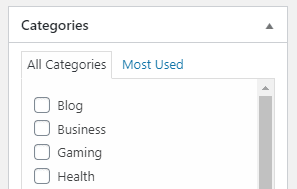
On the right hand side, you'll be able to create your first category. Once created you can add future posts to this category without creating it again. Most blogs have 5-10 categories.
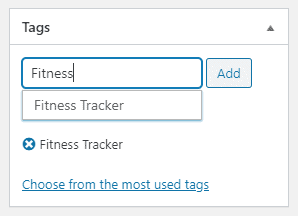
Below this you've got the tags. These help visitors find content as they can click on them on your blog and this will link to similar articles with the same tags.
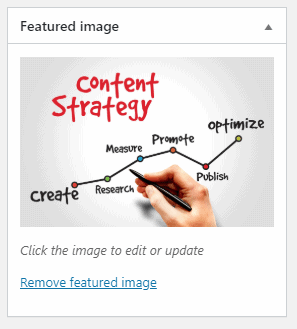
The featured image is the main image on your blog and can be used to add a colourful image to the front of your website. If you leave this blank your content will look dull.
Excerpt is a hand-crafted summary of your content and this often displays below the title on your blog posts. Not all themes offer this feature so it may not work.

Lastly you can set the slug or permalink, which is a user friendly way of making your post or page URL's. For example you could have yourdomain.com/this-is-post-1 or just /post-1.
Once you've written your post or page you're ready to hit 'Publish' - It's now on the website.

9. Additional Plugins
You can make your website even better with plugins, that offer additional functionality. There's millions of plugins out there, but here's my favourites.
- Contact Form 7
- Ultimate Shortcodes
- WP Bruiser
- Jetpack
- WP Super Cache.
There is plugins in a wide range of categories including Analytical, contact forms, email marketing, security, theme customisation, links and more.
You can go to Plugins -> Install to find them.
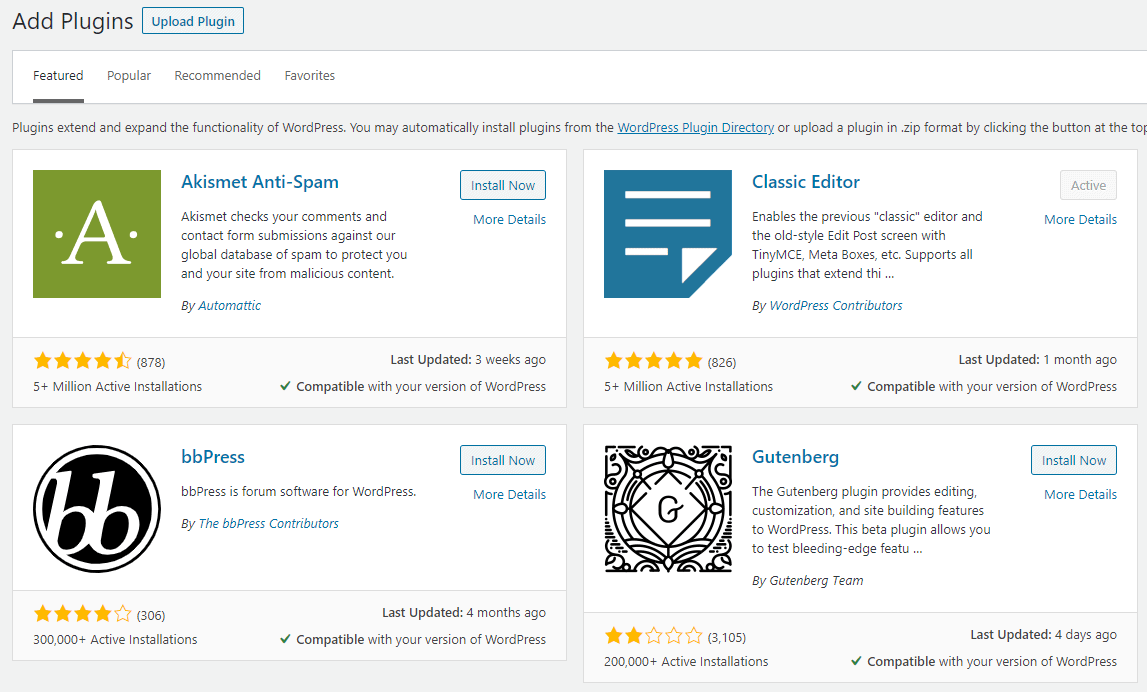
You can use the search box to find them. You can install in two clicks. Once to Install and a second to activate the plugin.
10. Connect Google Analytics
You'll likely want to keep track of visitors to your new website. While Siteground does offer free analytical stats, they aren't that great.
The most popular platform is called Google Analytics and is a free tool from Google.

You can track visitors, live visits and see who's visiting based on age, gender, location and device type such as mobile or tablet.
You can go to the official website and create a free account. You'll be required to download a piece of code which you'll install on your website.
Most themes have a place to put this, but if not you can install the Google Analytics plugin from the plugin directory and this will connect with your Analytics account.
11. Get Free Traffic
Your website is now ready to get traffic. You'll likely want to tell all your friends and family to check it out. If it's for your business, even better, now you can promote it online.
You can post your website:
- On social media websites such as Facebook
- Commenting on other websites blog posts
- Guest blogging, sharing content on other sites.

12. Your Website Is Setup
Congratulations, if you made it this far, your website is now official setup, configured and ready for use. Plus if you did most of the steps, your website should be setup within 60 minutes.
Hopefully you found this guide on how to start a website in Australia helpful. I'd love it if you shared it with your friends who might also want to create a website.
If you have any questions be sure to leave a comment below and I'll answer them.
Best of luck with your new website.
Start A Website FAQ’s
You can start a website for free using sites such as WordPress.com, Tumblr, Wix, Weebly. However these sites are only good if you don't mind someone else advertising on your blog. You cannot create a website for free without sponsored ads.
Once you start to generate lots of traffic, you nearly always need to upgrade to a premium account which can cost anywhere from $5-$25 per month. Your free website is no longer free and changing platforms is no longer an option as each platform has it's own unique setup.
We recommend buying a premium hosting and domain package at the start, making your site fast and you can change hosts or sell your site whenever you want.
You can start a website about anything, however for your first site this should be a topic that interests you. I always say to readers, if you can write 10 unique articles on your topic, it's a good idea. If you can't then you might need to re-think your idea.
You can also consider our blogging guide if you'd rather start a blog.
Using a self-hosted website does not have to be as expensive as you might think. You also don't need the services of an overpriced web developer. If you choose to host your site with Siteground, a service that I recommend you can get started for as low as $4.95 AUD per month.
Additionally a domain name would usually cost you $10-$20. Also you get a free SSL certificate, email address and enough storage and visitor traffic to host a huge website.
You can definitely make a lot of money with a website if you setup the right monetisation strategy. It's not uncommon to see websites making thousands of dollars a day from successful content.
When you are just starting, it can be disappointing to not make money straight away, but if you put in the work now, your site can definitely make money for years to come, passively.
If you want to learn how to use WordPress there's many videos on Youtube. In fact there's some that are 10 hours long, absolutely free of charge.
Additionally you can visit the official WordPress website which has many free tutorials.
WordPress.com is a hosted solution similar to Wix and Weebly. They own your website and content and you pay a fee to them each month. WordPress.org is the self-hosted community driven edition that you install on your own hosting with providers such as SIteground.
Verdict
Now you know how to start a website, the next step is to get on and actually do it. If you put it off you'll only regret not taking that initial action.
You can get a self-hosted WordPress blog for as low as $4.95 AUD per month using Siteground. Plus no lengthy contracts.
Installing WordPress takes a few seconds and you can follow our guide above to setup and create your first website.
Caleb McLaughlin
Caleb has been creating blogs since he was 16, a long time ago now and WordPress has come a long way since then. Gone are the days you need a web developer, anyone can start a website fast. Caleb is a certified WordPress developer, family man and mountain biker.
- 5+ Best Home Mesh WiFi Systems For Better Wireless - May 21, 2022
- 6+ Best Heat Resistant Gloves For The Ultimate Grill - May 21, 2022
- 5+ Best Power Towers For The Ultimate Workout - November 30, 2021